Author Archives: GCSDev

Fall Lawn Care

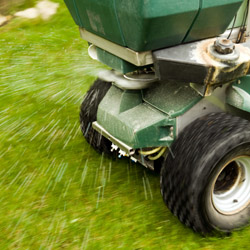
Fall is the best time of the year to overseed your existing lawn or establish a new lawn. If your lawn is a bit thin, has bare patches or needs good care, now is the time to take care of it so it can become thoroughly established before warm temperatures arrive in spring.

Overseeding A Weak Lawn

A weak lawn may have thin or scraggly patches, seem overrun with weeds or have bare patches that are difficult to keep green and lush. Overseeding can help eliminate these problem areas and create a more consistent, luxurious lawn.

  1. Spray broadleaf weeds with a selective herbicide and wait 2 weeks for the weeds to disappear. Several treatments may be necessary if the yard is thick with weeds.
  2. Take a soil sample of your lawn to determine the pH. A garden extension service can help determine pH levels, or home test kits are available.
  3. Mow shorter than normal and rake clean to remove unnecessary debris that may keep seeds from reaching the soil.
  4. Core aerate if you have compacted soil or heavy thatch. Remove the cores and dispose of them properly to keep the soil light and airy for seeding.
  5. Apply starter fertilizer and lime if determined to be needed by the pH test, or choose a grass type that will thrive in your soil’s conditions.
  6. Dethatch your lawn if thatch is thicker than ½ inch. This can be done with heavy raking or a special dethatching rake may be necessary in extreme cases.
  7. Overseed with the proper seed. If core aerating, lightly topdress with topsoil or humus.
  8. If needed, cover the freshly seeded area with netting or hay to discourage birds or other wildlife from consuming the seed before it grows.
  9. Water daily until grass has germinated, then soak once a week to encourage deep root growth.
  10. Fertilize in late fall with fall fertilizer.

Seeding A New Lawn

If you have no existing lawn or the entire ground is overrun with nothing but weeds, it may be best to start from scratch and create the lawn of your dreams.

  1. Kill existing vegetation with nonselective herbicide. If you want to preserve nearby trees or shrubs, take steps to protect that vegetation from the treatment.
  2. Take a soil sample of your lawn to determine the pH. A testing kit can provide a good pH estimate, or a gardening center or garden extension service can provide a more precise evaluation.
  3. Prepare soil by breaking up the surface with a rake or spade using a crisscross pattern. All large lumps should be broken up, and any large rocks should be removed.
  4. Broadcast starter fertilizer, lime and gypsum as determined by the pH test. This will provide a nutrition boost for fresh seeds.
  5. Spread topsoil or humus to a ½ inch depth for appropriate planting.
  6. Rototill to a depth of 4 inches and grade smooth. This will mix all the top layers together for uniform soil and nutrition, ensuring even turf growth.
  7. Sow proper seed and mulch lightly with salt hay to control erosion and conserve moisture.
  8. Water daily until grass has germinated, then soak once a week to encourage deeper root growth to resist droughts and repel weeds.
  9. Fertilize in late fall with fall fertilizer to provide nutrition throughout the season.

Which Seed?

Not every lawn will thrive with the same type of grass seed. Allow our staff to help you select the seed that best suits your needs, soil type and planting conditions. Apply at the recommended rate and incorporate into the top ¼” of soil. Do not bury the seed or it may not germinate evenly.

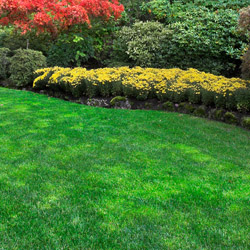
No matter what the condition of your lawn, fall is the best time to take steps to help it rejuvenate so you have an amazing lawn to enjoy in spring.
FallLawn_2FallLawn_1

Repotting Houseplants

Fall is an excellent time to repot many houseplants. Potted plants that have been growing outdoors during the summer have probably grown quite vigorously due to the high light levels and greater humidity. If the top growth of the plant has increased in size by 20 percent or more, it probably should be transplanted into a larger container so the roots can stretch and settle comfortably.

Before You Repot

Before repotting, check the plant and the soil carefully for insects.  Add systemic granules to the soil and spray the leaves with an insecticidal soap to remove any unwanted pests. If an insect infestation is particularly bad, it may be necessary to remove most of the plant’s soil and replace it with fresh potting soil. Avoid using soil from the garden, however, which will harbor insect larvae and eggs as well as weed seeds and other material you do not want in your houseplants.

Acclimating Plants

Bring your plants indoors well before any danger of frost for proper acclimation to the indoor environment. The change in light levels and humidity could shock more delicate plants, and they may wilt temporarily or drop leaves before they adjust to the new conditions. If possible, bring them in just a few minutes at a time for several days, gradually increasing their indoor time to several hours before keeping them indoors all the time. Flowering tropicals will also benefit from cutting back some of their foliage to avoid shock before being brought indoors.

To help houseplants overcome the transition from outdoors to indoors, position them in a bright, sunny area and consider adjusting indoor temperature and humidity controls to more closely mimic outdoor conditions. Make adjustments slowly and gradually, and the plants will adjust.

Time to Repot

Once your houseplants are adjusted to their indoor fall and winter environment, they can be safely repotted without adding to their stress. Repot the plants early in the day, and move them to a slightly larger pot. Avoid jumping several pot sizes, which could lead to excessive root growth while the foliage is neglected. Be sure to fertilize and water the plants appropriately to provide them proper nourishment as they settle into new pots. Do not expect luxuriant foliage growth right away, however, as it will take some time for the plants to begin growing again, especially in fall and winter when most houseplants are entering a dormant, slow growth period.

By repotting your houseplants in fall, you can help healthy, vigorously growing plants adjust to a new environment and continue their growth with ease in a new, larger, more comfortable pot.

Repotting_1

Fall Gardener’s Calendar

SEPTEMBER

Spray Bonide All-Season Spray on hemlocks to control woolly adelgid.

Spruce up the landscape by planting Fall Pansies, Flowering Cabbage & Kale,  Garden Mums,  Fall-Blooming Perennials as well as Trees and Shrubs.

Test your lawn pH to determine if you need to apply lime this season.  A 5o lb. bag of Lime will raise the pH about a half a point per 1000 square feet of turf.

Pick up your Spring Flowering Bulbs like tulips, daffodils, crocus, hyacinths, snowdrops and more!  An Auger for the drill will also help make planting easier.

Plant cool-season salad greens (arugula, corn salad, lettuce, radishes and spinach) in cold frames.

Apply Superphosphate now to coax stubborn plants into bloom next year.

Aerate, re-seed and apply Fall Lawn Food to the lawn.  Keep grass seed damp; water every day if necessary.  You will also want to check for grubs.  Increased activities of skunks, raccoons and moles as well as brown patches that peel back easily are an indication of grub activity.  Apply granular Sevin to control the grubs as well as chinch bugs and sod webworm.

Treat houseplants with Systemic Granules and Concern Insect Killing Soap now to get rid of any insects before bringing them into the house prior to the first frost.

Clean out garden ponds and pools.  Cover with Pond Netting before the leaves start falling.

OCTOBER

Plant bulbs.  Fertilize with Espoma Bulb-Tone and water in well.

Divide daylilies and spring-blooming perennials, including iris and peonies. Don’t be tempted to prune your spring flowering shrubs like forsythia, azaleas, camellia, holly, lilac, rhododendron, spirea or viburnum or you will destroy next year’s buds.

Rake leaves from the lawn and lower the mower blade.  Check your compost pile.  Now is a good time to add Concern Bio Activator to help break down brown leaves and lawn clippings.

Dig up summer-flowering bulbs, such as dahlias, cannas, tuberous begonias, caladiums and gladiolus after the frost kills the top growth.  Treat them with Bulb Dust, pack them in Peat Moss, and store them in a ventilated area for winter.

Fertilize your trees with Jobes Tree Spikes after the leaves fall. Fertilize azaleas, rhododendron, and evergreens with Holly-Tone and other shrubs with Plant-Tone.  Spray hemlock again with Bonide All-Season Spray Oil.

Set up bird feeders.  Clean out birdbaths, refill and purchase heaters for the winter.

Clean up and destroy diseased rose leaves and debris surrounding shrubs and perennials.  Mound 10-12 inches of dirt around roses to protect from winter damage.  After the ground freezes, cover roses with mulch or straw.

Remove annuals, roots and all, and add to your compost pile, but do not add any diseased material to it.

Cut back perennials unless they feature ornamental seed heads and Fertilize with 5-10-5.  Prune long raspberry and rose canes back to a height of three feet.  Clean up your beds and gardens to avoid harboring insects and diseases over the winter.

Pot hardy spring bulbs (anemone, crocus, daffodil, hyacinth, ranunculus and tulip) and place in a cold frame or cool garage (40 degrees) or sink into the ground and mulch.  Keep evenly moist.

Update garden records, noting successes and failures, gaps in planting, future planting and landscape changes.

Water all landscape plants well and mulch before the winter cold sets in.

Spray evergreens, azaleas, rhododendron, boxwood and rose canes with Wilt Pruf for protection against wind and cold weather.

King of the Cold: Ornamental Cabbage & Kale

Looking to add interest to the fall and winter landscape? This year, plant ornamental cabbage and kale for bold textures and vibrant colors.

About Ornamental Cabbage & Kale

Unlike most other annuals and perennials, these two hardy plants improve in appearance after a frost or two, which bring out more intense and brilliant colors in their foliage – perfect as an autumn accent or centerpiece plant. Identified by a number of names including floral kale, decorative kale, ornamental-leaved kale, flowering kale and flowering cabbage, ornamental cabbage and kale are classified as Brassica oleracca (Acephala group). Offering unlimited use in the landscape, these plants have large rosettes of gray-green foliage richly variegated with cream, white, pink, rose, red and purple. Kale leaves are frilly edged and sometimes deeply lobed.

While typical ornamental kale and cabbage varieties are easy to find, you can also try more unusual options, including dwarf varieties as well as upright, taller hybrids that can even be used in cut arrangements.

Using These Attractive Plants

Popular in borders, grouped in planting drifts, or planted in containers for the deck or patio, ornamental cabbage and kale typically grows to 12-18” high and wide, depending on the cultivar. Plant these specimens at least 12” apart in an area with full sun that has moist, well-drained soil. Organically rich soil with proper compost or fertilization is best to provide adequate nutrition for these lush plants. Although they are able to withstand light frosts and snowfalls, ornamental cabbage and kale will typically not survive hard freezes and are best treated as showy annuals.

The best foliage color will occur if ornamental cabbage and kale is planted in early fall as temperatures are cooling, or you can sow seeds 6-10 weeks before the first anticipated frost date – just be sure the seeds have sun exposure in order to germinate properly. These plants are usually attractive in the garden until Thanksgiving or slightly later, or in mild climates they may even last until spring temperatures begin to rise. Hint – when the plants smell like cooked cabbage, it is time to pull them out!

While these plants are superficially similar to the familiar cabbage and kale vegetables popular in salads and other edible uses, it is important to note that ornamental varieties are cultivated for color and shape rather than taste. Keep them out of the kitchen and in the garden instead, and you won’t be sorry!

KingofCold_1

Audition Some Autumn Bloomers

Extend the beauty of your garden with vivid autumn-blooming perennials. When you think of fall-blooming plants, don’t stop at mums – there are many perennials that can add color to your yard at this time of year.

Top Autumn Bloomers

While there are different autumn-blooming perennials for different growing zones and climate conditions, some of the most popular and widespread options include…

  • Fall Daisies
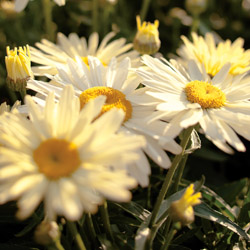
    For fall daisies (besides daisy mums!) grow Boltonia or Nippon Daisy. Boltonia is a tall (3-4′) grower, suitable as a background plant. White or pink daisies are borne in profusion atop fine grey-green foliage. The Nippon Daisy (Chrysanthemum nipponicum) is covered with large crisp white daisies in October. Both love lots of sun and make excellent cut flowers.
  • Autumn Sedums
    Bold-foliaged sedums provide texture as well as color in a sunny place. Sedum ‘Autumn Joy’ is the most well known. It has coppery-pink flower heads. Sedums ‘Brilliant’ and ‘Stardust’, with soft pink and white flowers respectively, are also attractive. For a totally different color combination plant sedum ‘Vera Jameson’. It has gray-purple foliage with rose pink blooms and looks stunning when planted with Blue Fescue, Artemesia Silver Mound and other silver-foliaged plants. As an added bonus, all the sedums are attractive to butterflies.
  • Autumn Asters
    Asters are another fall bloomer that butterflies love. These perennials like sun and moist, well-drained soil. There are many colorful aster varieties in shades of pink, purple, blue and white. Some favorites include tall-growing aster ‘Alma Potschke’ with bright pink flowers, blue-flowered aster ‘Professor Kippenburg’ and low-growing aster ‘Purple Dome’ with its deep purple blooms.
  • Autumn Goldenrod
    Sunny yellow goldenrod (Solidago) is another bright addition to the fall garden. Wrongly blamed as the cause of fall allergy problems, goldenrod has rightly taken its place in the fall garden. It looks particularly effective combined with blue flowering plumbago, purple asters and ornamental grasses.

Fall Bloomers for Shade Gardens

Even shade gardeners can enjoy late blooming perennials. Tall growing Japanese Anemones are a stately addition to the perennial garden. Bloom colors range from pure white to various shades of pink, and flowers can be single, semi-double or double blooms. Anemones grow well in light to moderate shade and spread quickly to form large clumps, filling in space vacated by spent summer plants. Turtlehead (Chelone) is another fast spreader for shade. Rose pink flowers cover the tops of the plant from early September to October. For a deeply shaded location, try Toad Lily (Tricyrtis), which has clusters of beautiful cream flowers, spotted with maroon along its upright stems. For light shade, plant Blue Cardinal Flower (Lobelia siphilitica), whose intense blue spikes can be admired from mid-August until frost.

No matter what type of garden you have, the end of summer does not need to mean the end of colorful blooms. Instead, just opt for amazing fall bloomers and enjoy brilliant color even longer!

Audition_3

Audition_2

Audition_1

Fall-Blooming Camellias

We love camellias! An Asian native and an old southern standby, they are now a favorite in the northern states as well. In recent years, new varieties have been developed for their increased cold hardiness, giving northern gardeners even more opportunities to enjoy these charming beauties. Blooming in October, November and even into early December, fall-blooming camellias provide an abundance of colorful showy blooms that can now be enjoyed in colder climates.

Camellias do best in rich, moist, well-drained, acidic (5.5-6.5 pH) soil. Plant camellias in a location where they will be protected from the drying winter sun and wind or else the delicate blooms may suffer. Because these shrubs are shallow-rooted, they should be planted no deeper than they are planted in the pot that you purchase them in. Apply 3-4 inches of mulch to the root zone to keep soil moist and control weeds. Compost added to the soil can also help provide suitable nutrition to keep these plants healthy. Water camellias first when newly planted and frequently during times of low rainfall – a drip system can be a great option to keep these shrubs suitably moist. Fertilize in the spring with a fertilizer specified for acid-loving plants. If purchasing and planting camellias in the fall, be sure to give them a little extra TLC to help them through their first couple of winters and they will reward you with their beauty for years to come.

To help you choose the most beautiful fall-blooming camellias for your landscape, consider these attractive cultivar options!

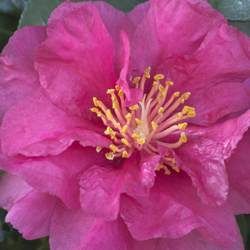
  • Ashton’s Pride: Lavender-pink, single flowers with yellow centers
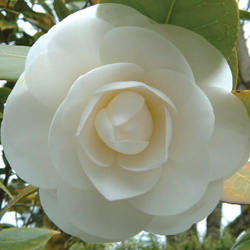
  • Ashton’s Snow: Creamy white flowers in semi-double blooms
  • Long Island Pink: Single blooms with bright pink colors and ruffled petals
  • Mason Farm: Pink, single flowers with a white tinge
  • Northern Exposure: Pink buds that open to single white, papery flowers
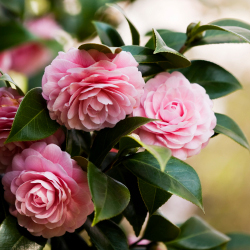
  • Winter’s Darling: Deep pink flowers with anemone shapes
  • Winter’s Fancy: Deep rich pink, semi-double blooms
  • Winter’s Interlude: Light pink blooms with anemone shapes and peachy centers
  • Winter’s Joy: Bright bold pink, semi-double blooms
  • Winter’s Star: Single lavender-pink pale blooms with yellow centers
  • Winter’s Water Lily: Elegant white flowers with a formal double shape

No matter which fall-blooming camellia you choose, if you give it the proper care, it will love you right back with abundant growth and stunning blooms that bring an air of southern charm and hospitality to your yard.

camellia_250x250_3camellia_250x250_1

camellia_250x250_2

Healthy Soil: Winter Cover Crops

It’s fall and our annual and vegetable gardens are winding down for the season. Now is the time to invest a little extra time and effort to prepare your soil for next year. Whether your garden is large or small, all annual planting beds will benefit from the addition of a winter cover crop.

Benefits of Cover Crops

A cover crop is a fast-growing, low-maintenance crop that can be used to protect your garden and landscaping beds in fall and winter. Depending on the crop you choose, it can provide many benefits to your garden, including…

  • Stabilizing soil and preventing erosion
  • Adding organic matter back into the soil to nurture later crops
  • Adding nutrients to the soil that have been used by previous crops
  • Suppressing disease that can wither new crops even before they start
  • Repressing weeds that will take over a garden
  • Improving soil structure with aeration and better drainage
  • Encouraging beneficial insects that will help later crops

Recommended Cover Crops

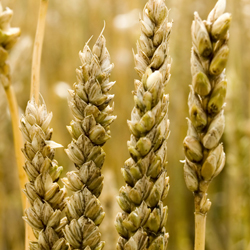
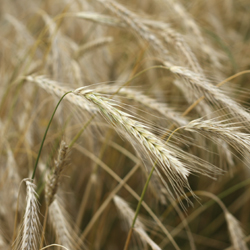
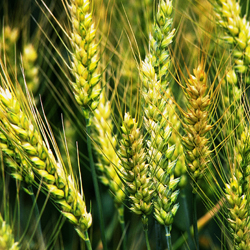
Different cover crops work best in different areas, and the climate, soil type and growing season will help determine which cover crops will work best for your gardening needs. The most popular recommended cover crops for our area are oats, rye and wheat.

  • Oats
    Sow 6-8 weeks before the first hard frost. Planted early, oats will provide a quick covering with the added benefit of providing an early planting time for next spring’s crops. Oats are not winter hardy, but they will grow in the fall and die in the winter, leaving behind nutritious mulch that will easily decompose when incorporated into the soil in the spring. This is a great cover crop choice for low- or no-till gardens. Sow at 2 lbs. per 1,000 sq. ft. for the best coverage.
  • Winter Rye
    Sow 2-4 weeks before the first hard frost. This is a good choice for gardeners who have late season crops and don’t want to cut off that last harvest. If hardened off before frost arrives, winter rye will continue to grow over the winter. Rye is a vigorous grower and can be difficult to turn in the spring, so bear that in mind depending on what crops you will be planting in spring. Sow at 3-4 lbs. per 1000 sq. ft. for appropriate coverage.
  • Winter Wheat
    Sow 2-4 weeks before the first hard frost. Wheat will cover quickly but is not as aggressive as winter rye. Winter wheat is also leafier, making it easier than winter rye to turn into the soil in the spring. Sow at 3 lbs. per 1000 sq. ft. to provide good coverage.

Cornell University provides a tool to assist you in choosing the correct cover crop for your situation. (https://covercrops.cals.cornell.edu/decision-tool.php)

Planting Cover Crops

Before planting a cover crop, clean out garden beds, removing all roots and plant material. Compost all plant matter that is not diseased. Broadcast seed evenly and cover with soil. Water thoroughly when planting and when necessary during dry periods. In the spring, till or fork oats into the planting bed and you are ready to plant. For winter rye and wheat, mow or chop tops 4 weeks before planting leaving cut cover crop on top to dry. Till or fork dried wheat and rye into the bed before planting.

With the appropriate cover crop, you can protect your garden’s most valuable asset – the soil – and be sure it is ready for spring planting.

oats_250x250

rye_250x250

wheat_250x250

The Great Squirrel Battle for the Bulbs

Autumn is the catalog time of year, when gardeners devour and drool over the spring-blooming bulb catalogs, eagerly fantasizing about next year’s flowerbeds. We picture drifts of crocus and gaily swaying tulips, lush daffodils and glorious hyacinths. Snowdrops, irises, daylilies… Ah, the garden will be great this next spring.

Then we remember last spring – hours of labor and dozens of bulbs meticulously planted, but only one or two emerged to flaunt their blooms. What happened?

Squirrels and Bulbs

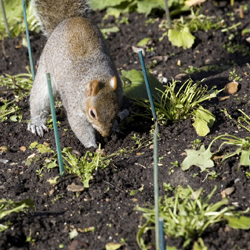
Squirrels like flower bulbs just as much as gardeners, but unfortunately not for their beauty. From the looks of the remains – chewed remnants, dug up holes, battered foliage – those bulbs became expensive squirrel food. Fortunately, if you want to plant daffodils, alliums, scilla, hyacinths, squills or fritillaria, your bulbs should be safe. Generally, squirrels don’t eat these. But how can you protect the bulbs that make the tastiest squirrel treats?

Keeping Squirrels Out of the Flowerbeds

Go ahead and order your bulbs. While you’re waiting for delivery, decide which of the three basic methods you will use to prevent the squirrel attacks. A small investment of time and materials will protect your bulbs.

  1. Mesh Barriers
    Wire mesh is the best protection to keep squirrels away from bulbs. Dig the hole for several bulbs, make a “cage” using mesh around the bulbs and fill in the soil. If the squirrels dig, the mesh will prevent them from eating the bulbs. You may also plant the bulbs as usual and place a layer of mesh on the soil. You’ll have to secure it to keep it in place then cover with mulch. Be sure the mesh layer is wide enough so squirrels cannot easily dig around the sides to reach the bulbs.
  1. Repellants
    Garden centers sell many different squirrel repellants, and deer repellants also repel squirrels. Some gardeners swear to the effective use of red pepper flakes mixed in the soil around, and over, the bulbs. Many squirrels don’t like spicy tastes, but pepper flakes may need to be replaced after heavy spring rains to be the most effective.
  1. Sharp Gravel
    Adding sharp gravel to the soil around and over the bulbs also deters squirrels from digging. Not only do they not like the feel of the gravel on their sensitive paws, but the gravel – which is heavier than dirt or mulch – is more difficult to move, so the bulbs stay safer.

There is another option to keep squirrels away from bulbs without completely discouraging their visits. If you can’t beat ’em, join ’em – because squirrels look for the easiest food sources, a squirrel feeding station stocked with corn and peanuts may be just the thing to keep the squirrels from looking for your buried treasures!

squirreldigging_250x250

bulbs_250x250

Glorifying Garden Gloves

Many gardeners believe garden gloves are easy to do without. Those of us who love gardening enjoy the feel of soil running through our fingers, and we don’t mind the line of dirt under our fingernails. We prefer to not have anything impede the dexterity needed to sow small seeds or pinch a plant, and we like the textures of the plants we cultivate. We would rather spend our budgeted gardening dollars on the latest herbaceous sensation rather than unnecessary gloves, and, frankly, nobody likes sweaty hands.

Why Gloves Matter

Despite the prejudice against covering our hands, gloves are the single most important piece of garden clothing that a person should own. In addition to the fact that they come in every color and pattern under the sun, making them an attractive and matching accessory to your garden wardrobe, garden gloves provide many benefits, such as…

  • Improving your grip on tools, minimizing accidental drops that can damage expensive tools.
  • Keeping hands warm in cold weather so we can garden in comfort even in early spring or late fall.
  • Keeping hands dry in wet weather to prevent skin irritation and problems that could limit our gardening.
  • Preventing contact with animal waste that may carry bacteria, mites or other pests that could harbor diseases.
  • Helping avert calluses and blisters that can make even simple gardening tasks painful and unpleasant.
  • Protecting hands from cuts, splinters and thorn pricks from aggressive plants so we aren’t limited in our gardening choices.
  • Preventing contact with poisonous plant oils that cause rashes and allergic dermatitis.
  • Keeping nails clean and help prevent nail breakage so our hands can be as beautiful as our garden.
  • Protecting from soil borne fungal and bacterial infections that could be spread around the garden easily.

With so many great reasons to use garden gloves, which ones should you choose?

Selecting Gloves

Gardening gloves come in an almost limitless array of colors, styles and patterns. Features may include…

  • Different types of fabric or weave densities that affect air circulation to keep hands cool and comfortable
  • Anti-slip grips or rubber palms and fingers for excellent traction in all types of gardening conditions
  • Broad, wide cuffs for an easy fit or snug, form-fitting cuffs for a secure fit that won’t let in any dirt or debris
  • Different sizes and proportions to suit men, women and children

With so many gloves on the market there’s a style available for every garden chore, season, weather condition, hand size and preference. Check out our selection today. We are happy to help you choose a pair or two that work best for you and your gardening needs.

gloves_250x250

Bring on the Bulbs for Better Home Value

Many homeowners, whether they just purchased their home or have owned it for years, are interested in increasing the value of their property. A better value leads to greater home equity, a higher resale price and the personal pride of owning a lovely home. Good landscaping can lead to a better home value, and there’s no easier way to improve landscaping than with beautiful bulbs.

How Landscaping Adds Value to Your Home

A well-groomed, thoughtfully planned and attractively maintained landscape is a great asset to your home. Your home’s exterior, including its landscaping, is the first impression visitors see, and good landscaping creates an attractive, welcoming atmosphere. Colorful landscaping can help attract notice to your property, while larger plantings provide shade and help with temperature control. Borders can conceal fences or unsightly foundations, and flowerbeds soften the edges of the house structure to provide an appealing sense of nature. Unlike interior home improvements that come and go with the latest design trends, good landscaping is a constant asset to your property and your home value.

Why Bulbs Are Best

Bulbs are some of the best options to improve your home’s landscaping and increase your home value. While bulbs won’t grow to provide shade to your yard and don’t yield tasty treats in a garden, they have many benefits that add solid value and enjoyment to any yard.

  • Bulbs Are Familiar
    Unlike exotic tropical plants or little-known cultivars of tree and shrubs, many bulbs are instantly recognizable. That familiarity is comfortable and reassuring, and adds a sense of peace to your landscaping. Tulips, daffodils, hyacinths, crocuses and lilies are some of the most popular and tried-and-true bulbs that can enhance your landscaping.
  • Bulbs Are Versatile
    While many plants can serve only one distinct purpose, bulbs can serve many purposes. Taller varieties can provide an effective screen for privacy or create stunning borders. Dense bulb patches can “paint” your landscape with flowing color, or bulbs can be layered in pots or containers for instant beauty. Bulb flowerbeds can be positioned along your home’s foundation, around trees or lining walkways, driveways or sidewalks. Bulbs can be strategically positioned to fill in thinner areas in your yard or landscaped beds as well.
  • Bulbs Are Beautiful In Different Seasons
    While a spring-blooming annual or a brilliant fall foliage tree may look stunning for one season, many bulbs offer beauty for far longer. Not only are their flowers showstopping beauties, but many bulbs have thick, graceful foliage that is delightful long after blooms may have faded. Furthermore, you can mix-and-match bulbs to keep a bed blooming from early spring to late fall without difficulty.
  • Bulbs Are Perennials
    Annual flowers are gorgeous but need to be replaced every year, a process that can be very time-consuming and labor-intensive. Bulbs, on the other hand, are perennials that will keep coming back year after year with very little extra care. With just basic maintenance – watering and the occasional removal of dead foliage – bulbs will grow back more lush and vibrant each year, continuing to add value to your home.
  • Bulbs Are Easy
    There’s no denying that bulbs are easy to grow and require very little maintenance to look their best. Bulbs can tolerate a wide range of soil types, pH levels and sunlight levels, and they often thrive even when neglected. This makes them an easy addition to any landscape, bringing their proven value to your yard quickly.

Improving Your Landscaping With Bulbs

It’s easy to improve your home’s value by adding bulbs. Simply choose the types and colors of bulbs you want, and you’re just three steps away from a beautiful landscape and a more appealing home.

  1. Dig – Dig the appropriate hole to plant your bulbs, paying attention to the recommended depth for the bulb type. You can dig individual holes for each bulb, or plant an entire bed at once.
  2. Drop – Drop the bulbs in the holes. You can position them in graceful, cultivated rows, or choose a more organic, natural look. Cover the bulbs firmly with soil and a layer of mulch if desired.
  3. Done! You only need to keep a simple eye on moisture levels and the occasional critter that may enjoy a bulb snack, and you’re done with bulb care and maintenance. Before long, both your bulbs and your home value will be blooming!

With so many benefits from landscaping and the ease of bulbs to create a stunning look, why not add to your home’s value today? Get digging – you’ll be done before you know it!